This is just a capture of the now offline ct90-ct110.com customisation section detailing the front disk brake conversion.

Front disk brake conversion for CT110 and CT90.
It’s important to note that these are NOT step by step instructions that you can follow. This web page is only here for showing you what someone with specific skills can do to customize their CT.
If you do NOT think you have the same specific skills, do NOT try to complete the described customization.
In the end, it is your sole responsibility if you decide to undertake the work required to attempt to duplicate a described customization.
Do you feel the need for greater stopping power on your CT?
While the CT’s drum brakes are adequate for their intended and designed purposes, many CT’ers have mentioned the desire to add in a front disk brake.
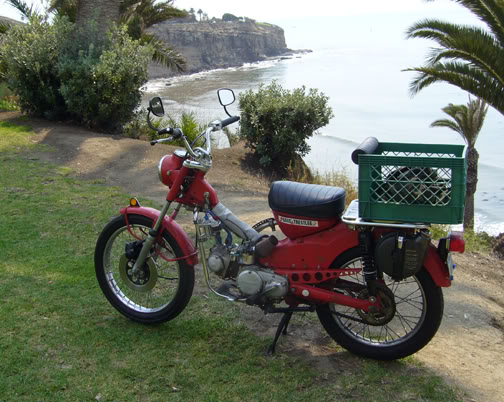
Gary Kane of Point Fermin, California has completed a front disk brake transplant with longer suspension travel front forks
Here’s Gary’s description of what he did.
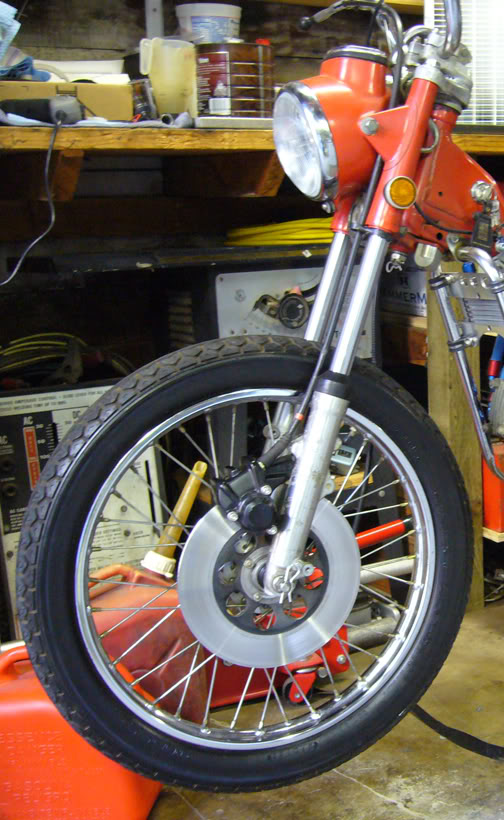
“After months of searching I finally obtained a 1978 CB125s2 front end on eBay. This is the one with fork scrapers (AKA dust covers) which I happen to prefer, rather than fork boots. The seller used a Sawzall to cut off everything south of the headstock, so I got the entire front end. Yup, that’s the original “Nitto 88” front tire, and the tube still holds air!. These are mechanical disk brakes, no hydraulics needed. Very clean without the handle bar mounted “master cylinder” and bulky hydraulic line. Plus these disk brakes are self adjusting (how cool is that!).
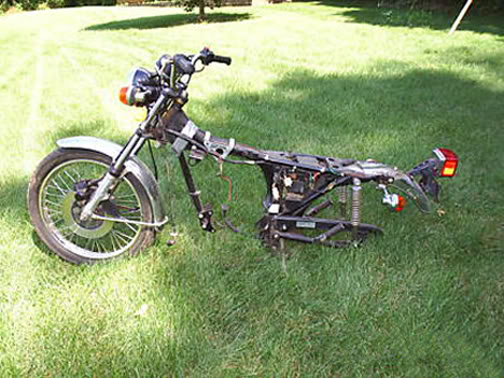
Upon arrival, I decided to see just how compatible the CB125s2 disk front end really is. Well thanks to the Honda economy of design philosophy it is a 99% “drop in”. I did not clean up anything, did not re-seal the forks, did not disassemble the caliper – did nothing.. (well OK a few things).
When I initially did a trial fit… What did I discover?
FORK STANCHIONS – The fork tubes are EXACTLY the same diameter as the CT90, so they fit into the CT90 triple trees PERFECTLY. They connect to the top clamp EXACTLY the same way. Even the top fork tube bolts are EXACTLY the same. Things are looking good.
TRIPLE TREES – The CB125s2 triple trees EXACTLY match the CT90 trees as to fork tube diameter and distance between the fork tubes. They do however have different mounts for headlight, horn, etc. This doesn’t really matter since the CB125s2 fork tubes should fit all but the early non-telescopic fork setup. Things are really looking good.
SPEEDOMETER CABLE – The CB125s2 speedo cable fits EXACTLY onto the CT90 speedo, even “twists” the same way even though it is on the other side of the wheel. The CT90 speedo cable didn’t fit. CB125s2 speedo gear drive uses a different attachment method. This is actually going to work.
I switched the CT90 speedo cable guide clamp to the other side and re- routed the CB125s2 cable behind the horn. I decided the best way to do this was to drill another hole in the headlight bucket, above and to the throttle side of the original cable hole to allow for a smooth no-crimp cable routing.
Since I got the CB125s2 chrome front fender I used it’s speedo cable plastic/rubber guide and mounted it to the rear/bottom of the CT90 front fender to keep the cable from making contact with the front tire. Safety first you know.
BRAKE CABLE – Oops, the CB125s2 brake cable did not fit the CT90 brake lever assy – darn! The CT90 cable has a “step down” ferule while the CB125s2 uses a thin ferule. Ok, now what do I do? I considered drilling out the CT90 lever housing, however, that seemed too risky. Since the CB125s2 cable housing is the same size as the CT90 cable ferule, I VERY CAREFULLY used my Dremel tool to remove that thin ferule. The resulting bare cable housing is an EXACT fit. Dodged that bullet.
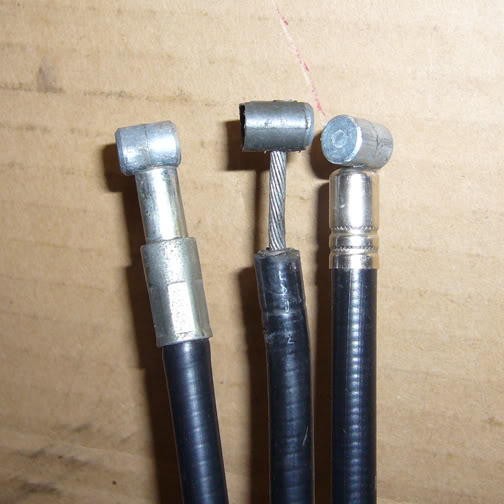
The CT90 cable is on the left, in the middle is the CB125s2 modified cable and on the right is the stock CB125s2 cable.
FRONT FENDER MODS – Thought I might just leave off the front fender – you know that wannabe “Street Tracker” look, but a quick blast through a mud hole quickly changed my mind. I think there’s still some stuck in my beard! Fortunately the CT90 fender does fit if you “notch” it to clear the caliper mount. I cut off the brake side of the CB125s2 fender mount to use as a template for this notch (then trashed the rest of that ugly chrome fender!). I also had to make another “1/2 hole” (not enough material for a full hole) for the rear mount point since it is higher than the front one. I used a washer and flattened the area to provide a solid fit. Lucky me, the horizontal fender supports did not break away. They only have spot welds, so I will weld the washer and some additional material to make the rear mount/support more robust as well as welding the front support. I wouldn’t want a spot weld to pop off in the wilds of Baja.
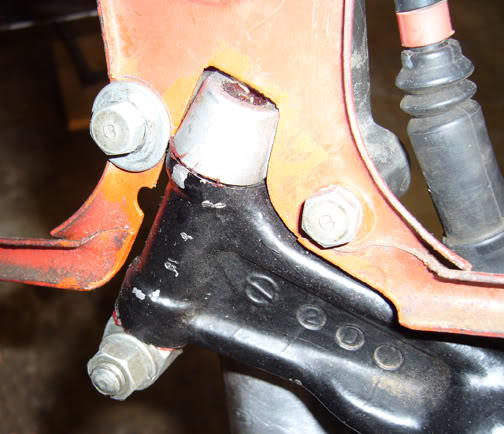
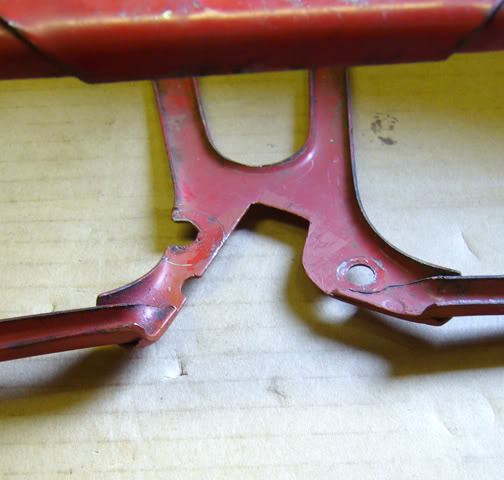
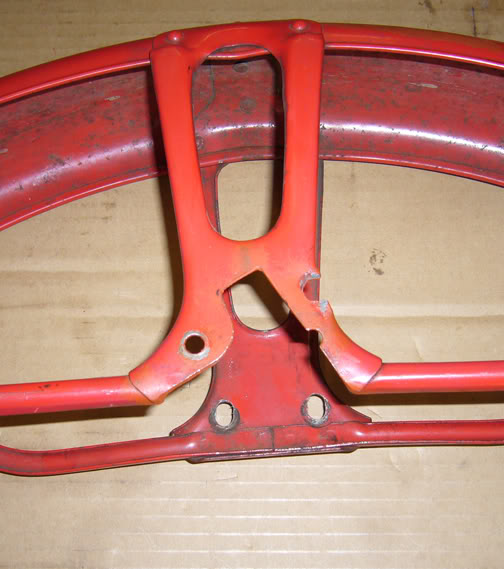
The other side has the EXACT bolt pattern so no problem there, however since the brake caliper mount pushes the mount location in, the fender will be ever so slightly cockeyed. To compensate, I used a round rat tail file and elongated the non-caliper side bolt holes up about 1/8″ to make the fender sit even. Like who is even going to notice?
The wider 18″ CB125s2 front tire was very close to the fender mounts and supports. I spread them further apart so they now have about 1/4″ clearance since I’ll probably put a knobby tire on. I’ll see how it handles the loose stuff first though. To remove/install the front wheel the tire must be deflated, a minor inconvenience but then that’s what air compressors are for. Anyway the most common reason to remove the front wheel is to fix a flat, so it’s already deflated – duh! The brake caliper disk cover fits, however, I chose to leave it off, I think it looks cleaner without it. I’ll put it on if I get sand kicked in my face.
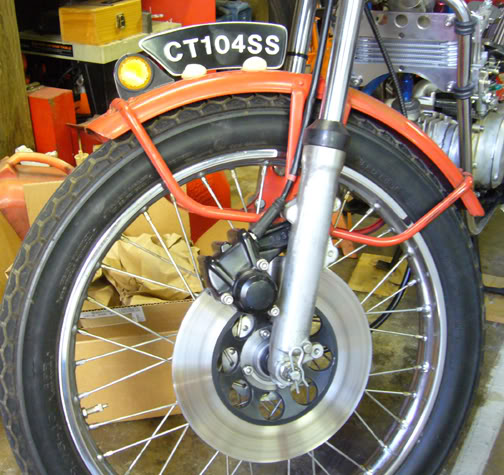
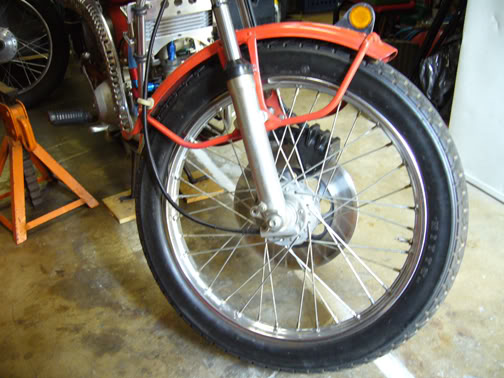
The above photos also show another project I’m finishing up. That’s a rare Honda front fender reflector (another eBay find) and my fabricated “pedestrian slicer” number plate mock up. I need to turn a couple 3/8″ or 1/2″ mounting posts on the lathe to complete. Something tells me that Plumber’s Putty just won’t do the job! Us retired old guys gotta keep busy you know.
STEERING HEAD BEARINGS – Since I had the forks off I decided it was time to replace my loose ball bearing setup with tapered roller bearings. Glad I did. Seems more stable at high(??) speeds and it will be much easier to service, since my ball bearings won’t fall out, roll all over the shop, and I won’t wind up on my hands and knees looking for my lost ball bearings (I give up).
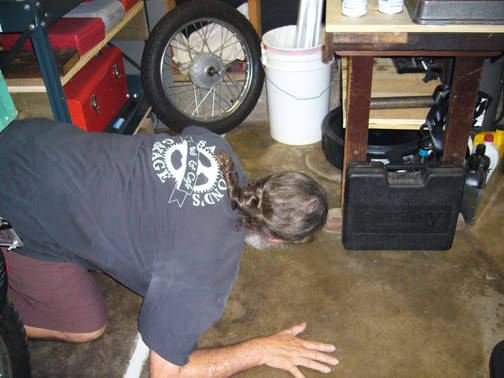
“When my ball bearings fell out I think they rolled over here”.
SUMMARY:
TRANSPLANT TIME – The whole initial transplant trial fit took less than 2 hours including measuring, planning, disassembly and partial inspection of the CB125s2 parts, etc. The hardest thing was Dremeling off the ferule (10 – 15 minutes). The fender mods took another hour. Test ride complete and safely back in the shop.
RESULTS – The patient survived, so I declare the transplant a success. The ride is noticeably smoother probably due to the 1″ of increased travel. The braking seems much stronger, but, then I really never needed more braking than the (properly maintained) stock setup – I just HAD to have that disk. And no, I haven’t attempted any “front wheelies” just yet.
SPEEDOMETER – As far as I can tell after riding my transplant the speedo appears to read EXACTLY the same as the stock setup.
FENDER – The modified CT90 fender does not make contact with the engine, which was a concern. It is interesting to note that the used 1970 K2 I bought already had some material removed from the bottom of the fender. I have seen many CT90 fenders with 2 dents matching the bottom head bolts. The fender really sets off the whole thing, makes the brake look stock. In fact I have had many people ask “when did Honda add the disk brake?”. I simply tell them “it’s a rare Japan only model”.
CENTER STAND – The center stand is still functional. I have a 3.00 oversize rear tire and HD shocks, both of which reduce the amount of tire to ground clearance when on the stand. With the CB125s2 front end I lost a little more but I can still rotate the front/rear tires, however, they do just scrape the ground. This means it’s risky to lube the chain on the stand using the running engine, in gear to spin the rear tire for me (talk about lazy!). Hey, it just might decide to go for a ride without me. I may weld pads (1/4″ – 1/2″) on the bottom of the center stand legs, or just live with putting a piece of wood under the stand.
MAINTENANCE – I found and downloaded a PDF service manual so I can properly service the new forks and brake system, it’s a little tricky. “


Leave a Reply